Tuesday, July 5, 2011

TV Shelf

Ok so it has been forever since I have posted, I have so many finished projects to add to my little blog, just never enough time to actually do it. I am super excited about this post, as it is Chris and I's first project together. We are Netflix junkies. easy convienent, and cheap. Well we have netlix on our Wii downstairs, on our bluray in the family room, and on his Playstation 3 in the family room. Well we decided we wanted it in our bedroom as well. Only problem is that the playstation is oddly shaped and nothing can be placed on top of it and there is no room anywhere else in the room for it. Also we really wanted our TV to be a little higher, so we had some Wood or particle left from some shelves we had done in our bathroom linen closet.

So we decided to measure and come up with a plan. A very simple plan but we're beginners. We measured twice, and drew our saw lines. We both sawed our three pieces we needed. Then we put them together. I primed it and chris spray painted it. All in a days work. It only took a couple hours and it is perfect for our little space. It was basically free since we had all the stuff already left over from other projects.

After we sawed here is Chris drilling holes for the screws

All screwed together, I started t prime and then remembered to take a picture
All primed

top of our dresser before

Top of our dresser after. TV is the perfect hieght now. Although I still need to fix all the cords so you can't see them. nothing bugs me more... I am the electrical tape queen.

A closer shot.

All together its nothing fancy, very simple, but also very functional for us.

Sunday, January 16, 2011

Finished Master Bedroom

Well here is the after of our Master bedroom. I am so excited that it's finally done well for now. I am still looking for the perfect matching nightstand and lamps for in here, but for now it feels so warm and comfortable. I am actually writing this blog in it as we speak. here are some of the details that I think make this room.

Modge podged picture frames. I bought these at a craft type store a couple years ago. Excited to finally use them.
My yard sale mirror I mentioned a few posts back.
I bought these pictures about five or so years ago at a party, it was a crystal party I think, and yes I bought pictures. I had these frames in mind for years and was just never able to afford them or when I could I couldn't find them. Kohl's was actually having a 50% off sale on thier frames so I was able to pic up 3 for the price of one and a half. Not to shabby. Thanks to my cousin Autumn for helping me measure and hang these so they were even and straight.
I got this directors chair many years ago from my aunt, and I loved it. back when I got it she gave it to me with a leppord print cover. I still love it, but am not as crazy about leppard print anymore. Ironically yesterday I was looking at the chair as it was in my living room and thinking I want to still use that but the leppard print has to go. Well I decided to stroll into Pier one, and in the back they had this turqious one on clearnace for $4.00. Great deal. The newer ones were upwards of twenty.
Here is a shot of the room coming out of the master bath.. shot was kinda fuzzy not sure why..

Here is a shot from one corner we did the macadamia nut color in here that we did through out our entire house with a chocolate accent wall
Here is a shot from the foot of the bed. P.S. the leppard print lamp will eventually go.
Shot of our Dresser. love the lantern and pillar holder. got them both at pier one as well.
My cedar chest with a towl over it that matches our bedding.

Well that is it for now. Soon we will have some before and afters of our master bath. Take care!

Saturday, January 8, 2011

Master Bedroom Sneak Peak

So our master bedroom, while huge, had no real chartacter. The previous owners had painted this interesting tan color through out the entire house. It was an ok color, no real character in it. Also in certain lights it had a bit of a pink tinge which was a complete no go. I want rich colors, colors that stand out. I had done nothing to our room. No pictures nothihng. hadn't even really decided on the placement of the furniture, I wanted to wait until we painted and give the room cozy feel. Another problem with the color in our room, besides the plain ness of it all, was that in the day it was so bright. That is ok for other rooms, but not for your bedroom.

I mean if you want to sleep in or when you get a migraine during the day, its super hard to rest in a really bright room, and I wanted something cozier. My cousin Mindy was visiting with her husband the weekend we decided to transform our room. well start anyways, so she helped me tape and paint our accent wall.. you'll see a sneak peak of that below. It took a couple weekends to complete. Feels like we have so much to do and so little time. I ended up getting some good clearance things to accent the room with.... Coming up you'll get to see the completed transformation.

Here is Mindy. Helping me paint. Thanks so much for you and Alex's help!

Saturday, January 1, 2011

Yard Sale Mirror


I didn't get a before pic of this, but it was pretty nasty. Dirty, paint chipped and abot 4 colors. I bought it for about $.50 at a yard sale. I am doing my master bedroom in Brown and turquois, so I thought I would do it in this ocean Breeze color by Krylon. I clean it up, and spray painted it.

Then I added black glaze, I know I am a glazing junky.


This is after I coated the whole thing and was waiting for it to dry.

Here is the finished product.

Saturday, December 25, 2010

Nothing Says Merry Christmas like ... Pillowcases?

A while back I saw this cute little pattern for pillowcases, and thought I can do that. Then I found the most adorable material. For some odd reason I have been way into owls lately. (check it out here ---->) I bought enough of it to make two pillow cases and then some coordinating fabric for the cuffs. But, I loved it so much I wanted to make something else with the material too. So I went back and bought about 6 more yards of it (it was on sale), and then bought a few different coordinating fabrics. I decided to make a quilt to go with the pillowcases. I haven't finished that yet, more to come on that one.


At any rate I was gushing to my family about how excited I was to make these adorable pillowcases and my family signed themselves up for some as well. A lot of pressure, I am a beginner at sewing and hadn't even made mine yet. I took down what kind of pillowcases they wanted and searched for a couple


months actually for just the right fabrics. My one Aunt wanted lighthouse pillowcases or something that would go good with her lighthouse stuff, and my uncle wanted nature-y type stuff. I bought some material that i was so not inlove with, but couldn't find anything else and was running out of time. I thought maybe it's just not my thing thats why I don't love it. I kept an eye out and one day at JoAnn fabrics saw the most perfect lighthouse fabric and natur-y fabric. I actually loved it. For my other aunt she wanted black and gray fabric to match her bedding. that was a little easier at least to mix and match. I spent about 12 hours one day making pillow cases. I feel like a pro now. LOL. I made my owl ones first, and boy am I glad, they are a little off, but it was my first time. and they still look adorable. Then I made everyone elses. I was quite proud of myself. I didn 't do to bad for my first real patterned sewing project. (get the pattern here. )


I took some of the reminants of the pillow cases and sewed enough to tie around them to make them look pretty. Here are the Black and gray ones I did. Here are the nature ones I did for my uncle all bundled up


A closer look
The Lighthouse ones all bundles up

A closer look.

Wednesday, December 22, 2010

I've been framed!

I am a new homeowner, and going from a 700 sq foot apartment to a 2700 Sq foot house is a drastic difference. I have a lot of stuff, but not enough to fill this house. Plus I would like to get rid of a lot of stuff I saved"in case" for when we finally got a house. I am however glad I did not get rid of this box of old frumpy frames. A friend game me 2 chairs a few years back that are unique but have never been my style. Well the good news is, I learned how to take the unique frame of this and make it my style. I decided to make the one chair I am puting in my front living room the focal point, and planned my designing around this. I will post the chair at a later time since I am not finished with it. I have the beautiful material I am reupholstering it with. The material's colors are white gray, yellow, and black. I decided red would look awesome in there too. So with this in mind. I looked at the bare walls in our newley painted Living room and knew I needed to get cracking on what to put on those walls.


Being new home owners, we are on a pretty tight budget and a lot of frames are quite expensive, especially when you want a few of differnt sizes and colors. So I looked in my box of old frames. There were two sets of frames that were connected with those little claw brackets you see to the left. I removed those and had 4 usable frames. I played around with the design I wanted on my living room floor. then decided on the colors. Ever since I learned about glazing from Brooke at All Things thrify, I have been obsessed. I decided in sticking with the colors in my chair, that I am designing the whole room around, that I should do the frames in black, gray, yellow, and a red one to make it pop. So Iprimed the ones that needed it with an adhesion primer, since I didn't feel like sanding that many frames, and spray painted them.


After a few coats of paint and drying, I then used black glaze on the gray and yellow ones to give them an antiqued feel. I absolutely love the way they turned out. I was so proud of myself for being so bold as to use the yellow. My husband cringed at first like "um are you sure about that"... but I am happy about my bold desicion. I think once My living room is finally complete and all the pieces have been found and are placed it will look even more amazing. I will have to do a different post, and show how they look on the wall with our pictures. I spent about 14 hours on photoshop getting all the pictures together and editing and adding effects to them for all the frames I had piled in my living room. I will have to show more of my picture and frame projects a different time. but for now here is what the end result was.


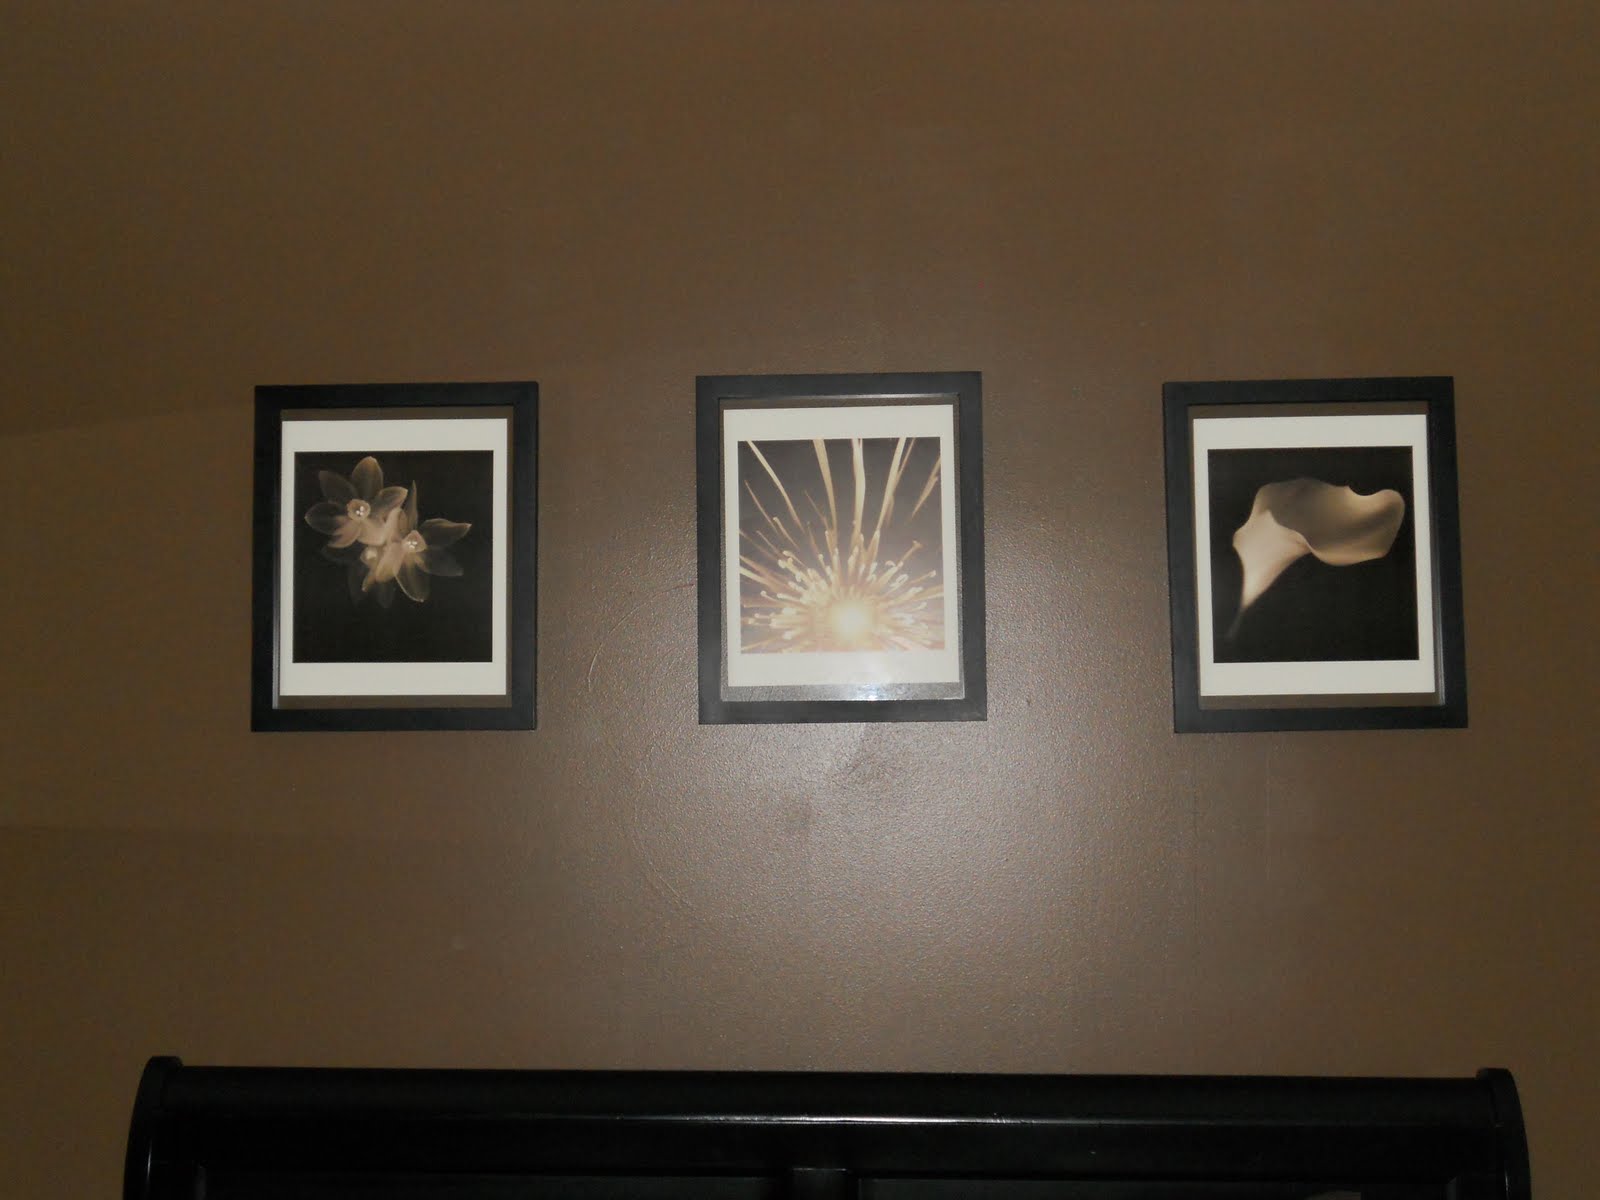
These bottom ones are the ones we have on the opposite wall of our yellow frames. Husband has a burgandy framed picture of the Boston Temple, that is just beautiful that I wanted to kind of frame with our wedding pictures. I used the gray and black ones you see above in the design on either side of the Temple pic. The red one is an accent frame I want to place on an entry table that I have yet to find. Still on the hunt, I know what I want for this room but have yet to find just the right peice.


These are the yellow, gray and black ones and they layout of how I placed them on the wall.


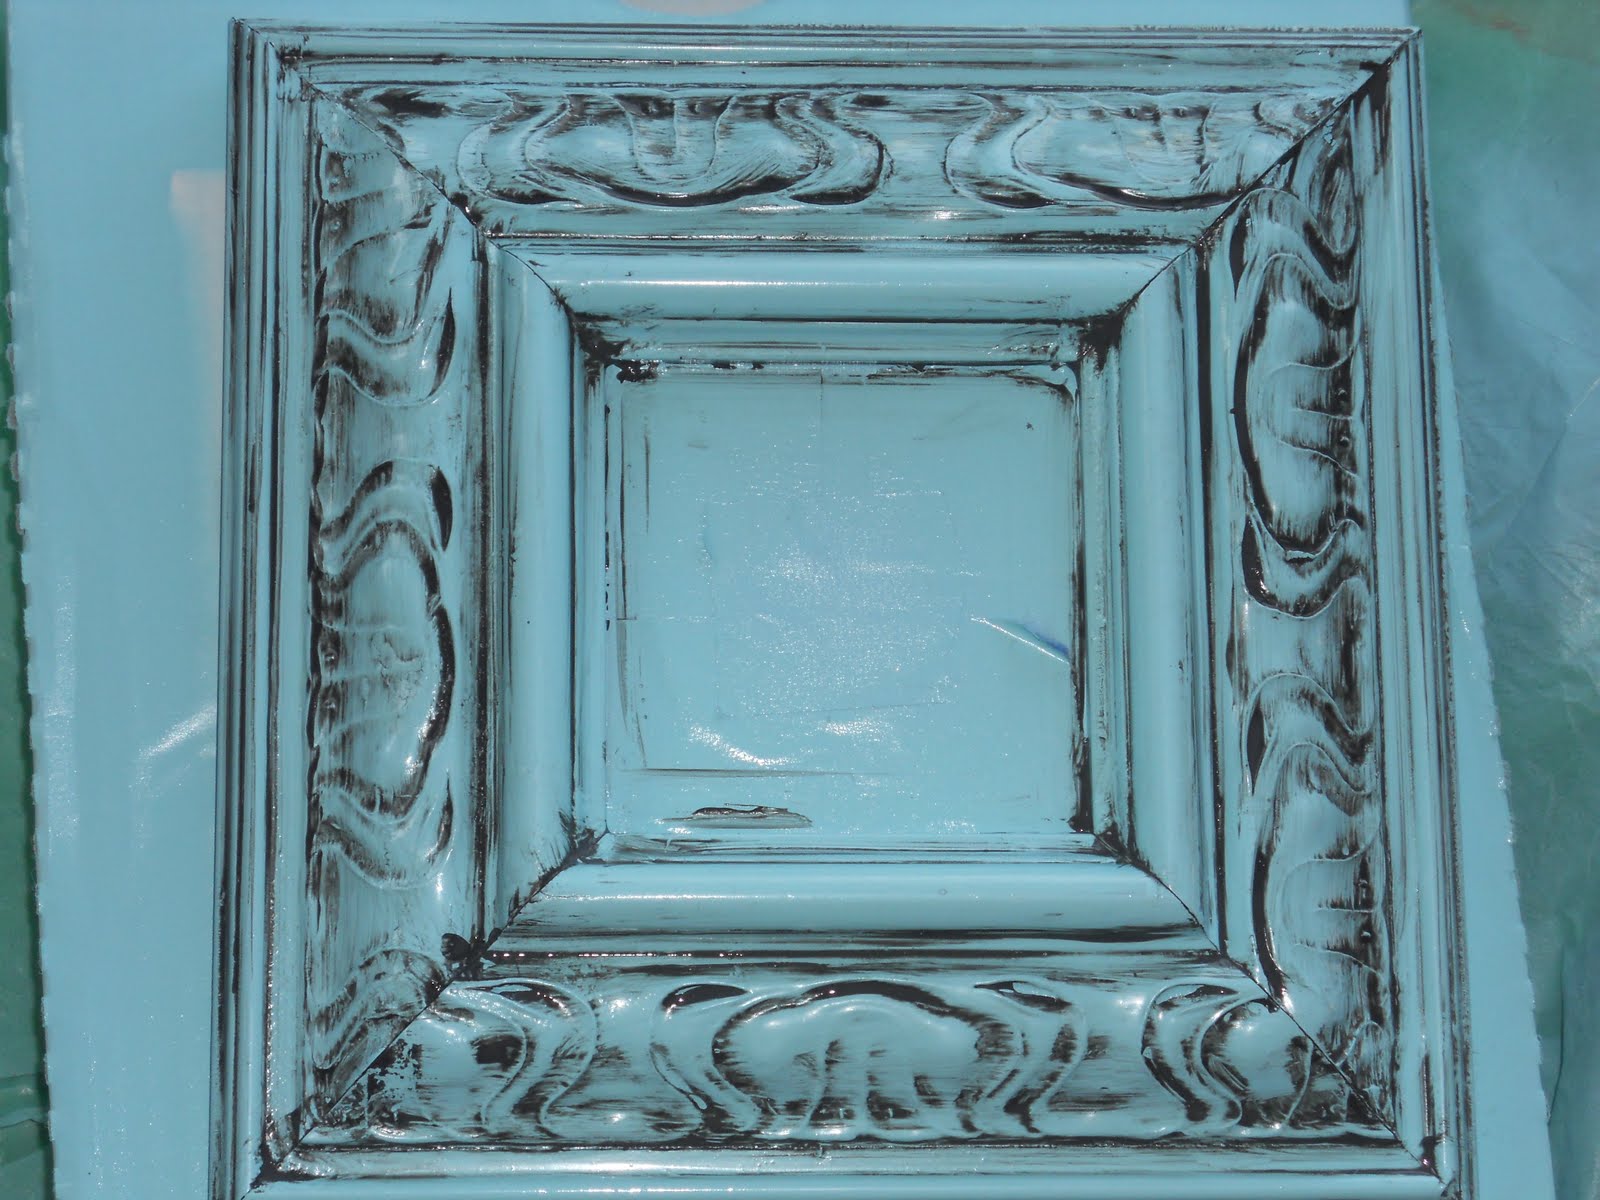
Here is a close up of the detail on the 11.5 by 14 yellow frames. I LOVE them. I can't say that every chance I am inclined to take will turn out like these but I am definatly happy with them.


Okay well this should have been at the top I guess here is a before on some of the frames.

Wednesday, December 15, 2010

Nightstand


So back before the snow fell and the fall was still pretty warm, the husband and I went yardsaling. Well we didn't set out to yardsale, but as we saw signs for one I made him go on a hunt to find it. He was none to happy. But, we did find some great bargains. At this particular yardsale I walked away with a run down old wood chair that needs some major TLC for $1, 2 old mirrors with crazy designs, they were pretty nasty looking, they were $.50 each, and a nightstand for $5.00. Spent $7.00. not bad. The night stand you see to your left there had descent harware, didn't like the super shiney knobs, so I spray painted them with a hammered metalic charcoal color. I am not sure of the exact name, I will have to put it in a post at a later time.

The drawers would not come out so I had to work on it with the drawers in... Not an easy feat. I will later have to put fabric or something inside the drawers since the particles of the spray paint stained the inside of the drawers. I lightly sanded the imperfections and raised areas on the nigthstand, and since the materials were kind of a shiney vinear type, I had to use a adhesion primer to help the spraypaint stick and not just bead up and roll off. I rolled on two coats of adhesion primer then two coats of satin black spray paint. Then I added the newley spray painted knobs to the nightstand. I reall love how it turned out. An inexpensive find, that I was able to transform into what I needed for very little. only the cost of spray paint. (I already had the primer)